
Do you know the feeling of having a great idea in your head, but when it comes to the execution it takes on a mind of its own? Yah, that happened to me tonight. It got out of control, I almost lost it, but then I reeled it in for a solid finish...
Here's my card:
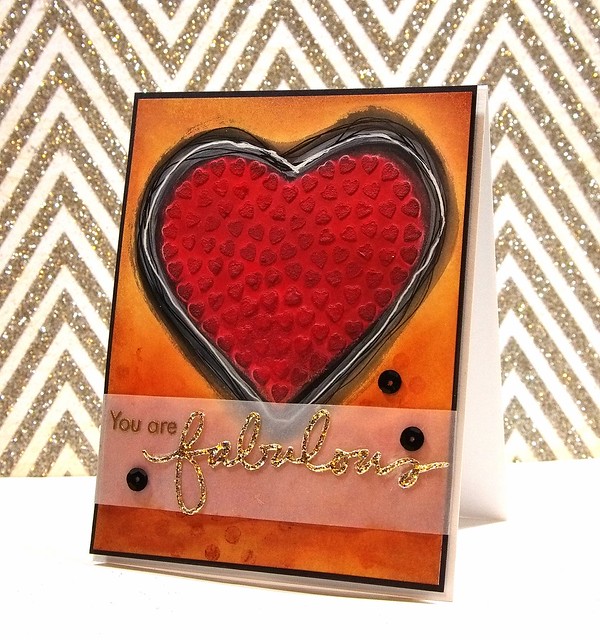
I initially wanted it to be a white base with that pop of red from the die cut hearts (I am playing along with the current Case Study challenge HERE), but that's what I'm talking about... It veered. Big time.
I started the card off by die cutting the hearts (Memory Box die) and used the negative as a stencil. I scraped some embossing paste through it and then added PanPastels in red tones.

This step would have been better if 1) I removed the negative before drying and 2) used a thicker paper or even chipboard for the negative. It was too floppy.
So what ended up happening was some of the embossing paste stuck to the negative, and some of the PanPastels got under it. So I just filled in the whole area:
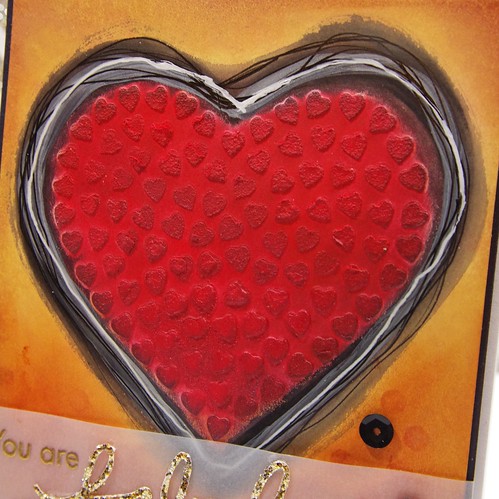
Once I filled in the whole heart area I surrounded it with various products:
Black Oil Pastel
Black Pitt Pen
White Pitt Pen
White Gel Pen
Black Stabilo pencil (with waterbrush)
The remainder of the background:
Distress Inks: Scattered Straw, Rusty Hinge, Vintage Photo
Technique Tuesday Lots Of Dots stamp set
The sentiment was the fun part. Who doesn't love glittery die cuts?!?!
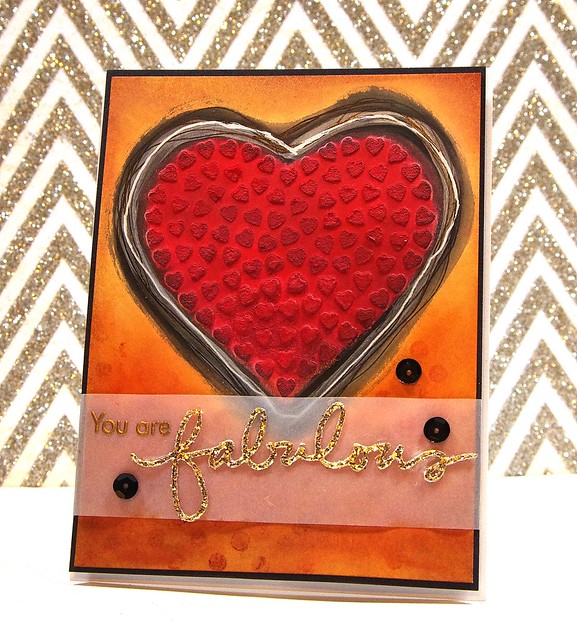
Products used for sentiment
Vellum
Black Sequins
American Crafts Glitter Paper
"You are" from Technique Tuesday set I Like You
"Fabulous" by Technique Tuesday Say It Fabulous Die Cut
Here is the inspiration for my card:


3 comments
Super cute!
ReplyDeleteLaura
This really came out nice. I love the freestyle outline around the heart where you've craftily made it look like the heart layer was done last... how did you do that! Must be the Black Stabilo pencil (with waterbrush).
ReplyDeleteIt is so cool Tobes.
ReplyDeleteThank you for commenting!