


Hi there! Today I'm sharing a fun little fall-inspired project at the SRM Blog.
I find I can never have too many gift boxes ready-to-go. Today I'm sharing a quick little creation that's perfect for any Autumn gift-giving occasion.

Supplies:
3x3x3 Kraft Box
3x3x3 Kraft Box
Today I'm sharing a little treat bag that's a just because project! It's fun to switch up projects instead of always cards-cards-cards. I find it boosts my creativity when I create something non-cardish and it inspires me to think out of the box.


This is a simple little treat bag that would be perfect for a teacher, cat-lover, or anyone who needs a kind word!
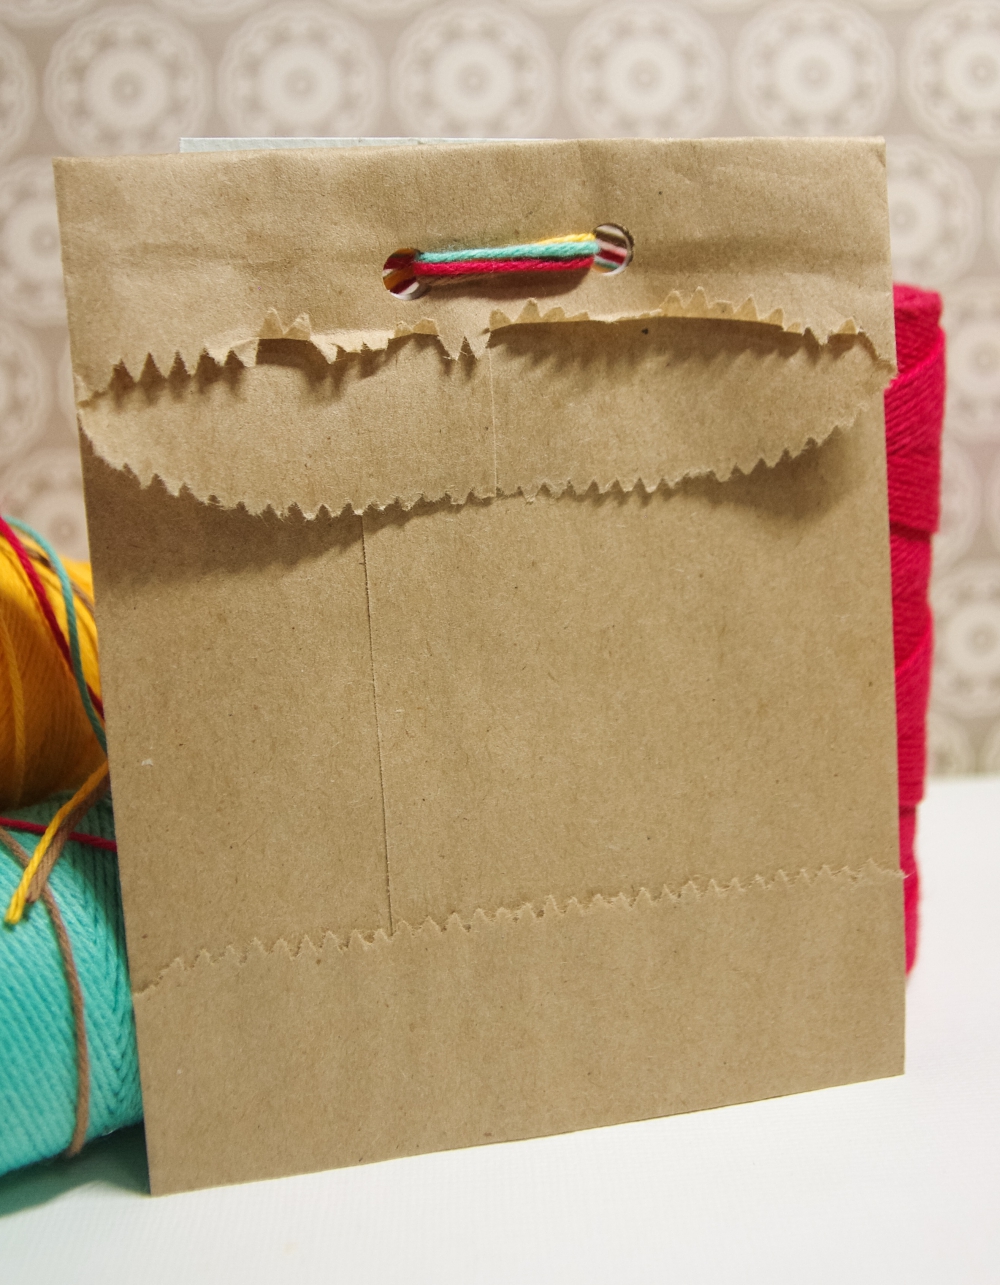
I punched holes right through the bag so the contents would stay in. The twines look so pretty!!
(Kraft Bag by SRM)
There are a few factors that lead to my lack of blog posts since moving to China:
- Blogs are illegal in China. Blogs are for talking about whatever you want... China hates that.
- Internet is incredibly slow because China literally monitors every piece of information going in and out of the country, including pictures of my measly cards... Ex. there are approx. 80 internet nodes leaving the USA. If the CIA or whatever wants to monitor the traffic it's a huge job. China has THREE nodes!! Three for 1.7 billion people. This is the problem...
- I must use a VPN that tricks the crazy China people into thinking I am in a different country where I have rights and freedoms... This slows the internet down further.
- Our days are incredibly long here and I am physically exhausted every evening when I crawl through the door after 6pm. I am teaching singing/musical theatre all day and it is very physical and I don't get "down time". It's hard to be creative when you want to die.
I still create on weekends and on nights when I have some mysterious mojo flowing, but really, the musical I'm directing (Addams Family) is taking everything I got right now..
I am still creating with the kids at school, though! I have a craft club and we have a table for our "Arts Festival Carnival" on Thursday and I'm excited about our offerings:
First, an altered picture frame
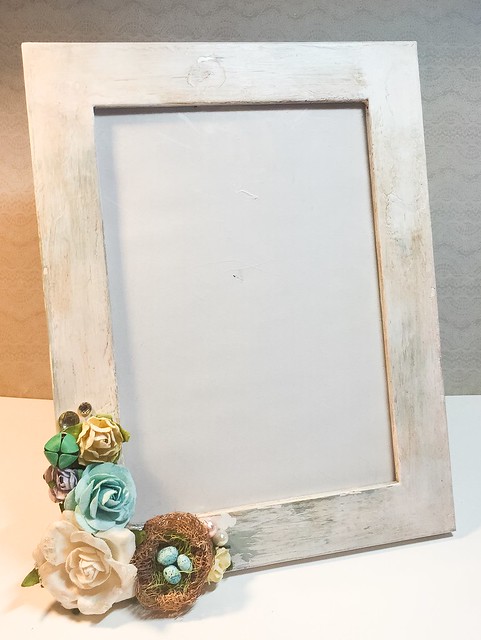
I used an Ikea frame and DecoArt Chalk paints.. A tutorial is coming shortly!!
Next, a Pinterest-inspired project that was very enjoyable!

Unfortunately I only had grey yarn for the pompoms, but it was cool to show the girls how to make these pens from scratch, and I think they turned out very well!!
And lastly, Watercolour Mugs! Another Pinterest-inspired project..
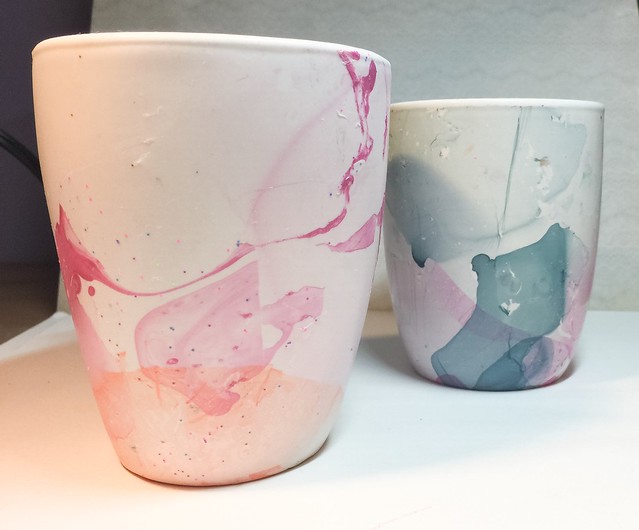
The one on the left is mine, the one on the right is my husbands!! So easy a man can do it, hahahaha...
I've got some other projects ready to share this week.
Thanks for your patience, if you're still reading this!
I really am sorry for being such a bad blogger...
Bye!!
I'm so happy that I'll be spending another year with on The Twinery design team.
Their twine is has always been one of my go-to staples so it's a total no-brainer for me ;)..
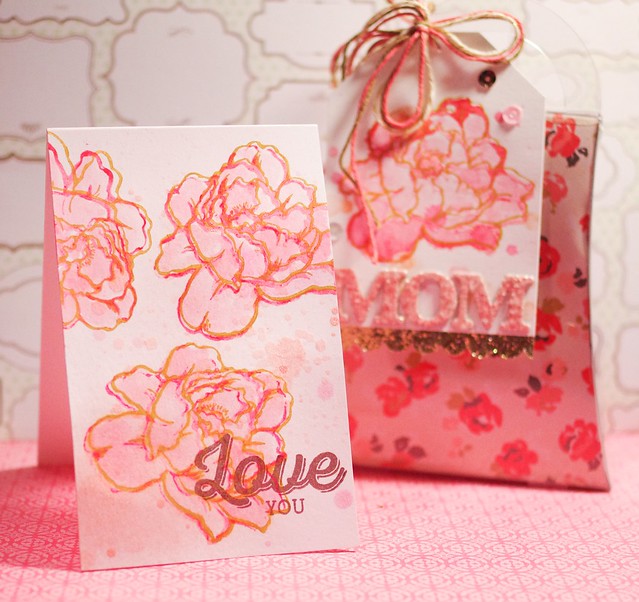
Here's a project I have up on The Twinery Blog if you wanna take a gander:
The excitement continues as conclude our grand tour of amazing artists playing with Stampendous, DecoArt, and Princeton Artist Brushes via inspired by Willow Wolfe products! The inspiration has been amazing, and today you'll be even more astonished! If you missed the beginning of our journey, be sure to go back and check it out! MONDAY - TUESDAY - WEDNESDAY - THURSDAY
In preparation for our big move I've decided to do a mini reno of our kitchen. While I was painting the cupboards (Annie Sloan Chalkpaint in French Linen!) I had the bright idea to make one of the cupboards a chalkboard menu... Here she is:

I need some practicing on my chalkboard writing, but this was a project made easy with:
- DecoArt - Clear Chalkboard Coating
- DecoArt - Black Acrylic Paint
- Stampendous - Cling Jumbo Pears
- White Chalkboard Pen (Washes off with water)
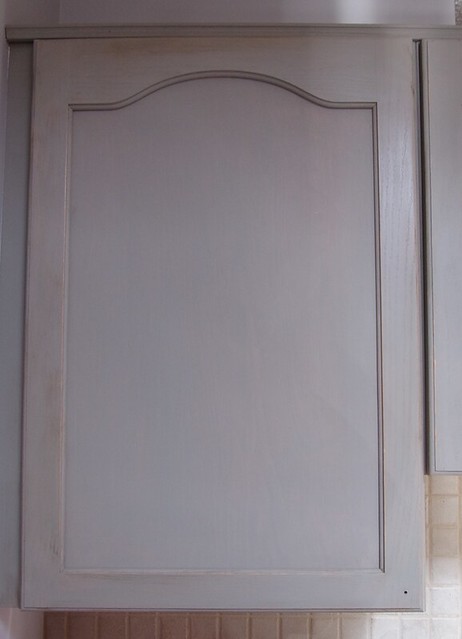
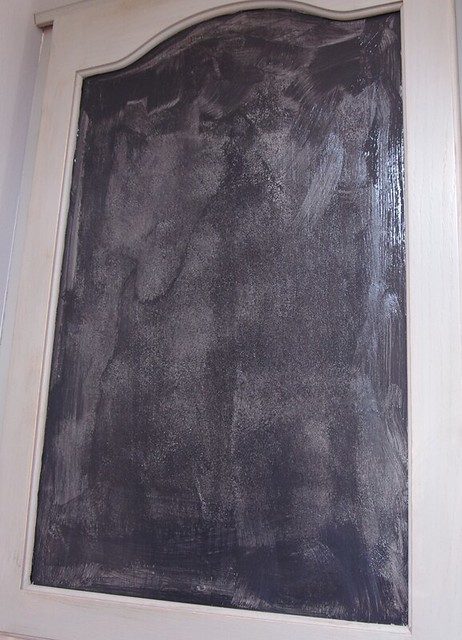

This shows the progression from beginning, to one coat, to two coats of black. After the black is dry I applied two coats of the clear chalkboard paint.
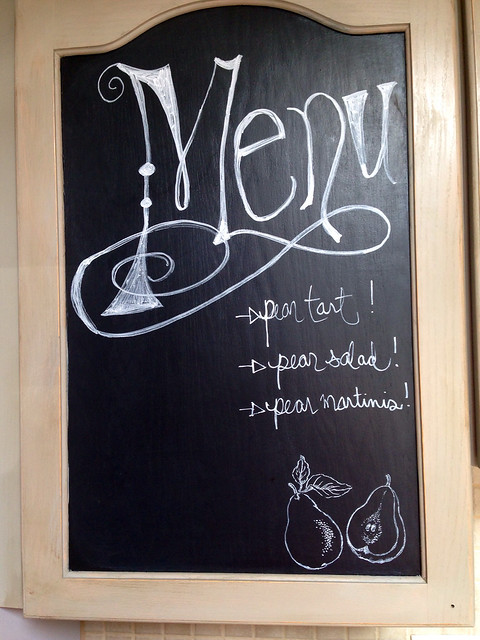
Are you wondering about those perfect pears? Aren't I a great artist?! Ha, I wish... Since the pen that I used to write on the board wipes off with water, I figured I could colour onto the stamp, "huff" on it before I stamped and it would work.. I was right!!
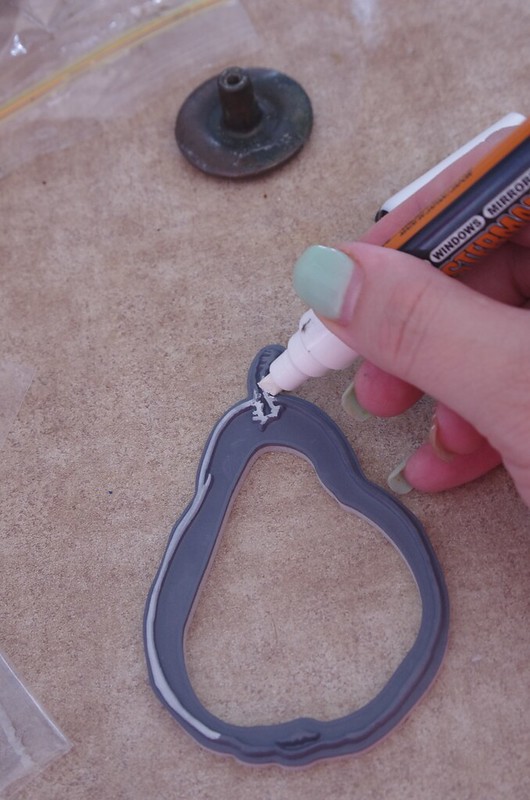
This way, I can stamp anything I want on the board and all I have to do is wipe away with a wet cloth!! Cool, right?!
Of course, there are prizes! DecoArt is sending three sets of their Media Fluid Acrylics, Princeton Artist Brushes via inspired by Willow Wolfe is donating Select 3750 Brushes and some Catalyst Wedges, and we'll be adding a Stampendous Creative Palette so you can practice all the techniques you'll see this week. We'll be sending three prize packages to commenters with U.S. Mailing Addresses, and DecoArt will be sending three generous sample packages to international commenters, so all our friends can play.
Visit each blog, leave a comment! • Like Stampendous, DecoArt, Princeton Artist Brushes, and inspired by Willow Wolfe on Facebook! • We've also got a Pinterest Board started!
Please repin our projects on to your boards and be sure to tag us when you do (#Stampendous, #DecoArt, #PrincetonArtistBrushes, #byWillowWolfe) - we'll be tracking. Your comments on the blogs are your entry into the drawing! AND I have a few bonus goodies hanging around my office for some lucky people who SHARE our Facebook posts and Pinterest Pins! Ready for your trip around the world??? Pack your bags, get a cup of coffee and a kitten, and get comfy. You have until the end of Sunday, June 29 PDT to comment on all the blog posts.
Louise Crosbie (Scotland, UK)
Lea Kimmel (North Carolina, USA)
Claudia Neubacher (Vienna, Austria)
Asia King (Oxford, UK)
Iliane de Fockert (Elly) (Niedersachsen, Germany)
Suzanne Czosek (Illinois, USA)
Julia Stratford-Wright (near London, UK)
Kristine Reynolds (California, USA)
Angelica Stark (Hudiksvall, Sweden)
Mark Gould (West Sussex, UK)
Debbie Cole (California, USA)
Jamie Martin (Oklahoma, USA)
Tobi Crawford (BC, Canada) that's me!
Wendy Price (New Jersey, USA)
Jessa Plant (Arizona, USA)
A few of the bloggers this week are new to hopping, so if you have an issue with any of the links, here's a little tip! If you get a page that says "Sorry that Page is not here" or something similar, try clicking on the header of the blog, or look for something that says Home. The hop page should be near the top of the day's posts. We will fix broken links as the day goes on, as well, so check back here if you are really lost.
The Official Rules.
The excitement continues as we lead you on a world tour of amazing artists playing with Stampendous, DecoArt, and Princeton Artist Brushes via inspired by Willow Wolfe products together! You'll be amazed at what they've created! If you missed the beginning of our journey, be sure to go back and check it out! MONDAY - TUESDAY - WEDNESDAY
Today I decided to alter a cheap iPhone 5 case. I saw them in Fred Meyer and they were the most boring things I've ever seen, but they were a blank canvas... Literally.

So I set off priming it with DecoArt White Gesso. It covered nicely, and serves as a great base for other paints to go on top! (Just so you know, their Gesso is like Liquitex's Super Heavy Gesso.. It's thick and luscious!
I sponged a bunch of stencils on like so:
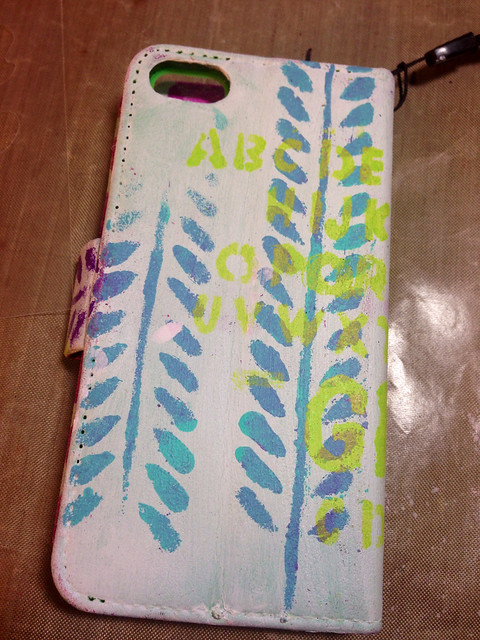
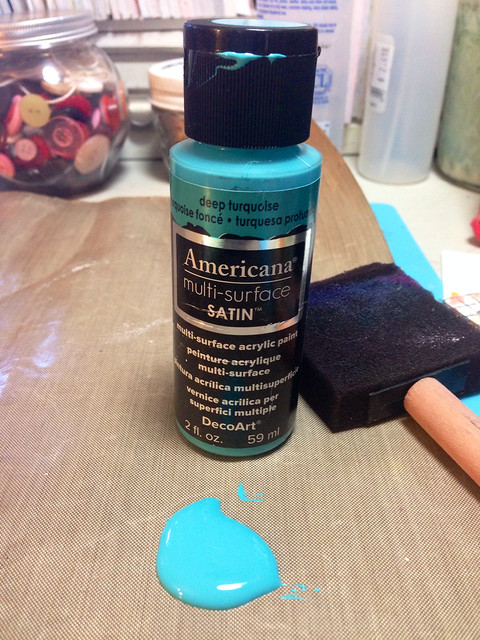
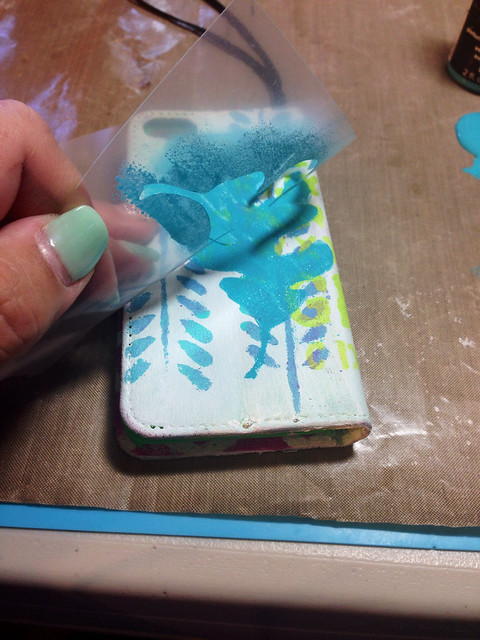
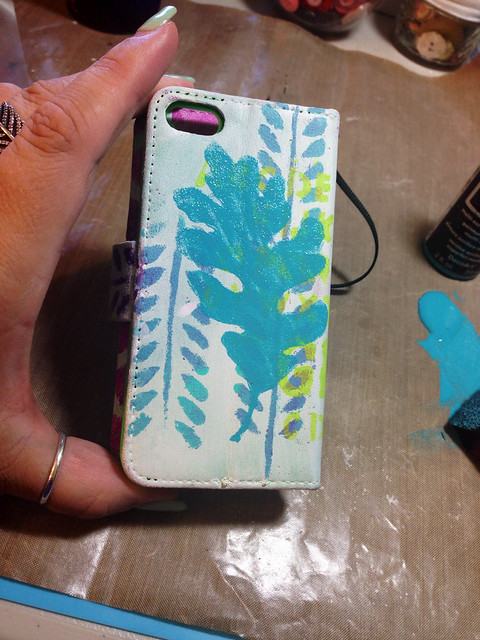
I used the All-Surface Acrylic paints and FREE stencil from this stamp set: Cling Jumbo Leaves.
A little doodling and it's finished off in the back:
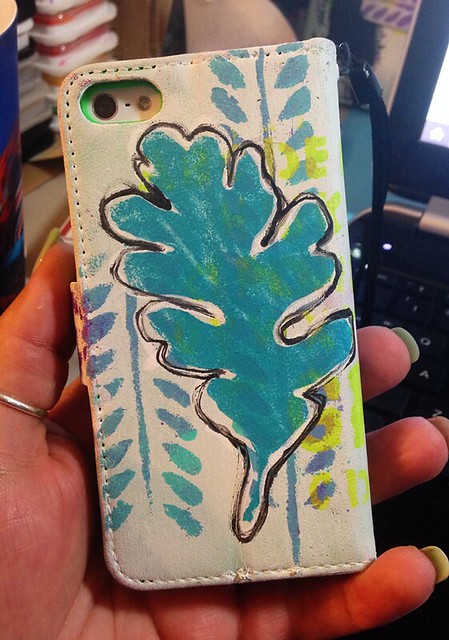
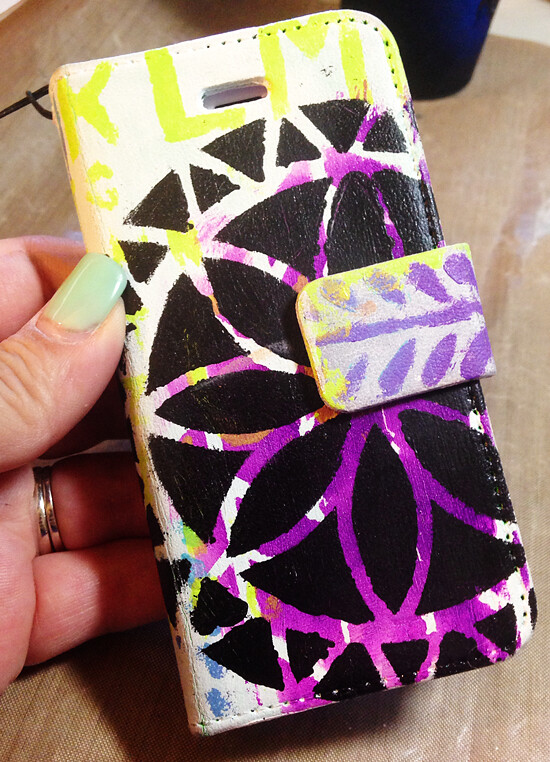
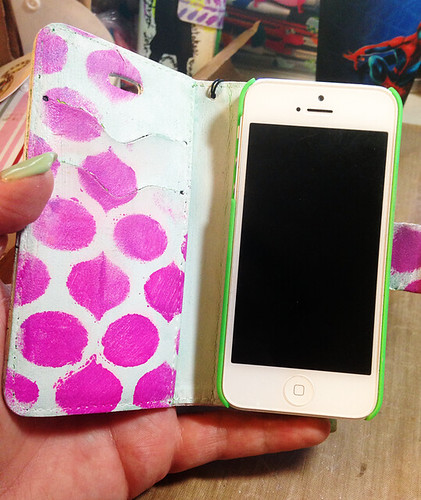
And here's the front and inside:
Visit each blog, leave a comment! • Like Stampendous, DecoArt, Princeton Artist Brushes, and inspired by Willow Wolfe on Facebook! • We've also got a Pinterest Board started!
Please repin our projects on to your boards and be sure to tag us when you do (#Stampendous, #DecoArt, #PrincetonArtistBrushes, #byWillowWolfe) - we'll be tracking. Your comments on the blogs are your entry into the drawing! AND I have a few bonus goodies hanging around my office for some lucky people who SHARE our Facebook posts and Pinterest Pins! Ready for your trip around the world??? Climb on board!
Louise Crosbie (Scotland, UK)
Debbie Cole (California, USA)
Iliane de Fockert (Elly) (Niedersachsen, Germany)
Julia Stratford-Wright (near London, UK)
Suzanne Czosek (Illinois, USA)
Kathi Rerek (New Jersey, USA)
Wendy Price (New Jersey, USA)
Tobi Crawford (BC, Canada)
Melanie Artz (Seattle, WA)
The Official Rules.
One day while I was Pinning I happened upon a great tutorial for making mini-books and then didn't think of it again... That was until I saw the maker of the tutorial (Cheri Piles) in a LSS and got to thumb through all of her amazing work. Colour me inspired!!!
I went home and made this:
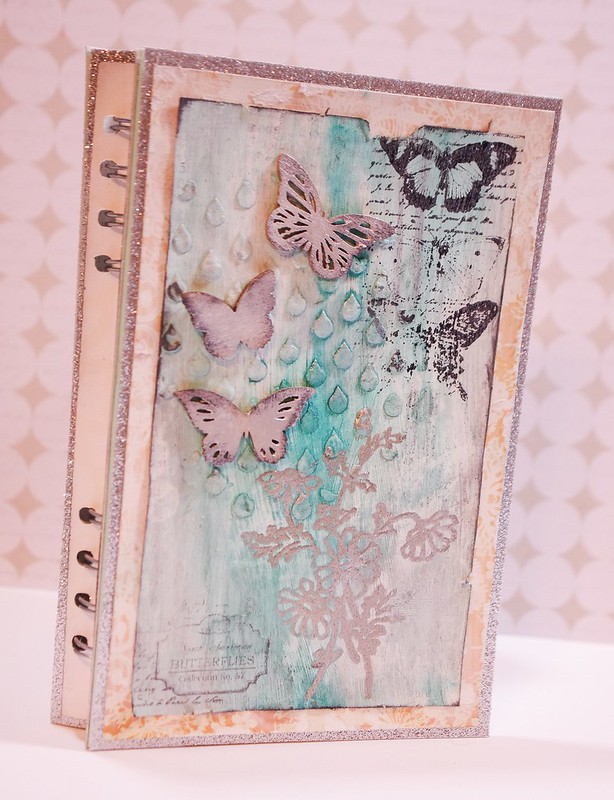
I went with a real mixed media-looking cover and used a lot of silver to glam it up.
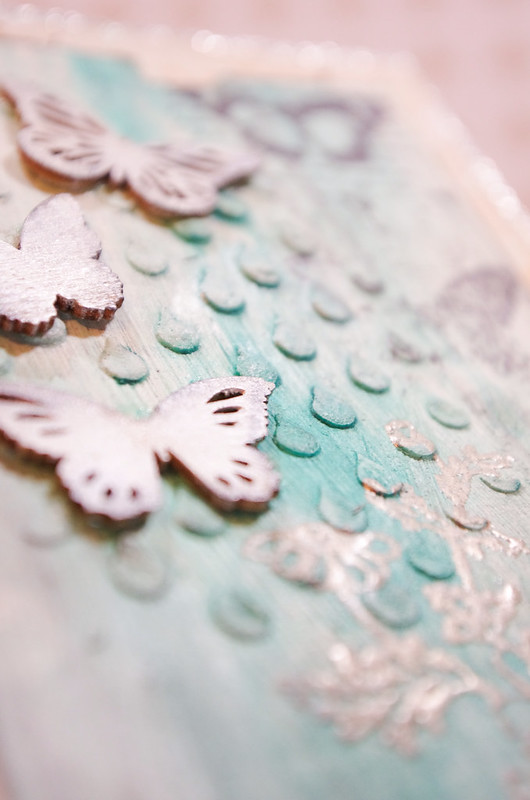
I used molding paste through a tear-shaped stencil then covered it with various paints and ink sprays.
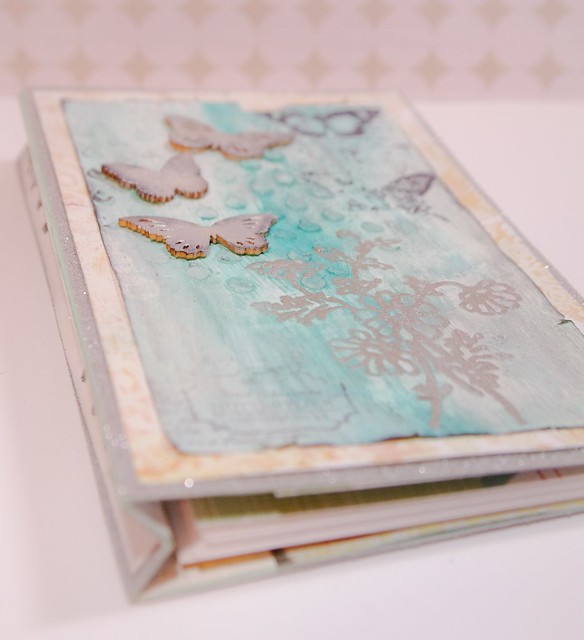
I used some DecoArt Metallic Lustre (similar to Inca Gold) on a few wood veneer pieces and stamped Technique Tuesday's May Day Greenhouse Stamp Set in Versamark then embossed with silver EP.

I filled the inside with heavy white cardstock to allow whomever gets this to journal to use some heavier mediums, if they wish. I put a piece of patterned paper as sort of a cover page and DONE!
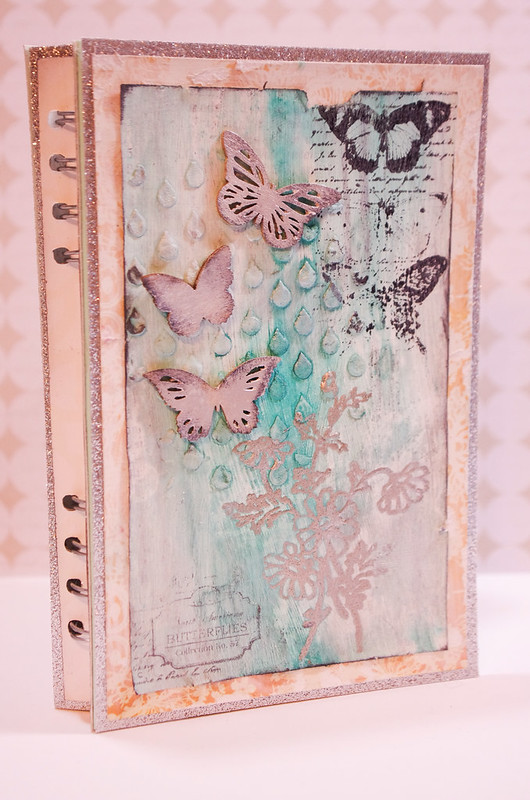
Thanks for stopping by and make sure you head to Cheri's blog for the tutorial!

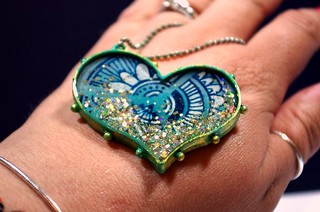
This week we’re joining with two more craft industry partners, ICE Resin and Imagine Crafts. We’ll be using our stamps, Imagine Crafts’ Tsukineko® Staz-On™ ink and ICE Resin, bezels and embellishments to make some terrific jewelry. We know some of you have looked at this process when we’ve shared it before and probably thought, “I should try that someday!” Well, there’s no time like the present. This process is so easy and simple that you really need to just dive in, you’ll fall in love with it, we promise, and you’ll be creating jewelry for yourself and all your friends before you know it. The biggest benefit of these projects is that you never have to wonder what you’ll do with it when it’s done! People are so excited to wear your creations!
Here's a little slideshow showing the steps I took to make my two little pieces.
Get the flash player here: http://www.adobe.com/flashplayer
My farewell TSG post.
It still makes me sad to think about TSG closing, but what are you going to do.
I am already so busy with design team stuff that I could probably do with one less team (my husband has urged me to let one or two go) so this may be a blessing in disguise for me.
So last night my son and I took part in a gift exchange and the poor guy got landed with two of these lucite picture frames with really ugly pictures in them. He nearly cried! lol... I decided to alter one and see what I could come up with:
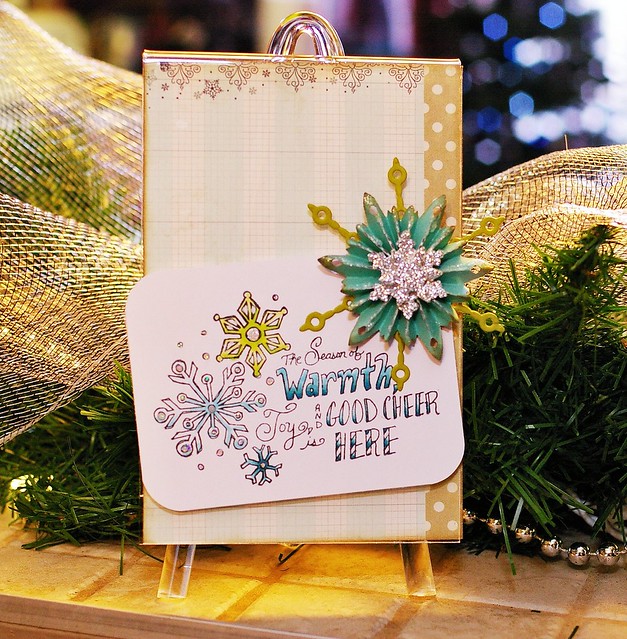
I used a new set called Be Merry (still in stock!! Get it while it's still available!!!) and coloured it with Copics. I added a few die cut snowflakes to give the project some dimension and that was that!
 |
| Click here to go to the store. |
All stamps are now 25% off. Get them while they're here!
Topical Tuesday: Chalkboard Ornaments
- December 10, 2013
- By Tobi Crawford
- 2 Comments
Hi there,I'm here with a fun kid-friendly Topical Tuesday for Annabelle Stamps!
I bought a package of plain, clear Christmas ornaments knowing I wanted to decorate them somehow, so really this was all just playing around...
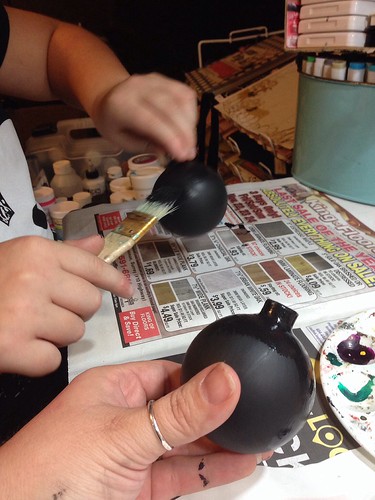
First, we painted our ornaments with Black Gesso. Yes, there's BLACK gesso! It dries matte so I figured it would look just like chalkboard paint (because I didn't have any...).
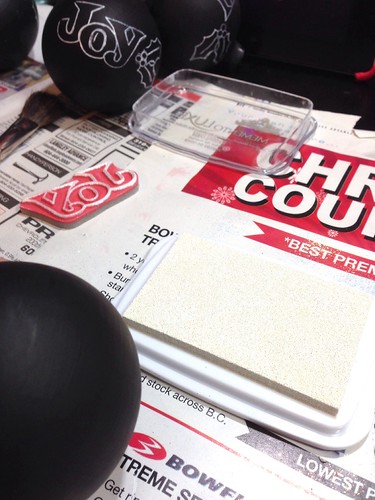
Next, using a few stamps from Holly Jolly Christmas, I stamped in white pigment ink onto the ornament. Hint: don't mount the stamps on anything. Use your fingers to help the stamp hug the curves of the ornament.
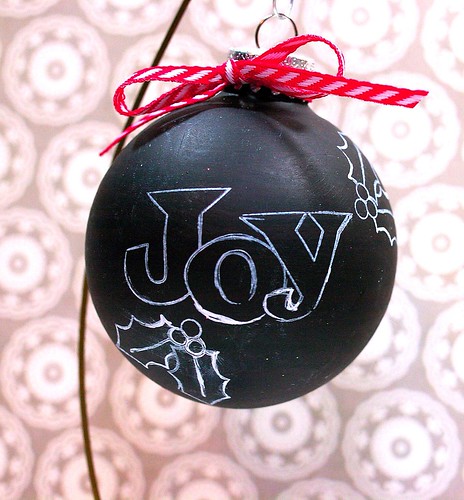
So when all was said and done, I liked the clean-and-simple look of the black and white (with a touch of red) better than my attempt at colour:

I still have a few ornaments left to decorate, I wonder what I'll do with them??!!
Merry Christmas! I hope you enjoyed my post today!
Welcome to day three of new releases from There She Goes stamps! Our second set from new illustrator Danielle Lounds find’s us celebrating the holidays with her unique style of combining handwritten sentiments, with super cute images. I love that the words can be colored, and the tag image will be perfect for cards, and gift giving.


Today I made a fun project that came from my own little brain!! I am so happy they turned out to be so cute!
I decorated a couple of mini Mason jars and added these cute little chalkboard tags made with today's set! This was a really quick gift to put together, now I just have to go find some candy to put in the jars... I'm thinking some Jelly Bellys!
Instead of the snow-globe idea (that's what I've seen a lot of people do with these tiny trees) I put everything ON TOP of the jar. I covered the lid with Glossy Accents and pressed the mica flakes and the trees into it while it was still wet. The next morning everything was solid as a rock!
Be Merry is a 4x8 set that includes a total of 9 stamps and will sell for $18.00. It will be released on Saturday, November 30th at 11pmEST.
 Would you like to win the new Be Merry stamp sets? Here is what you need to do- visit the Trendsetter’s blogs that are participating in each of the blog hop challenges below and comment on their creations as you go. One of the Trendsetter’s blogs (from each hop day) will be randomly chosen as the ‘it’ blog and a winner will be picked using a random number generator from the comments left on that Trendsetter’s Blog Hop Challenge post.
 You will not know which blog has been chosen so the more you comment on the better your chances are of winning new stamps! The Blog Hop Challenges will be open until 5 PM Eastern Time Saturday, November 30th with the winner being announced during the release party chat.
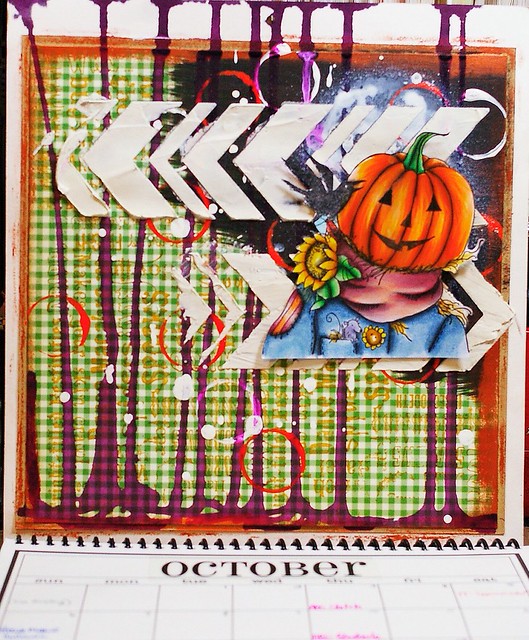
I've shared a few months of my DT calendar before and today at the Stampendous Blog I have a tutorial with October's page:
There She Goes September Release: Day 3
- September 26, 2013
- By Tobi Crawford
- 14 Comments
Today we have another SUPER fun set from Melyssa, one that will get you ready for all your Halloween gift giving ideas!! Not only is it a PERFECT tag set, the sentiments and image could be used for cards, scrapbooking, and anything else you desired!
I LOVE the fact that there are lots of different label shapes to choose from and they are so gorgeous that they can definitely be used year-round... Check it out:
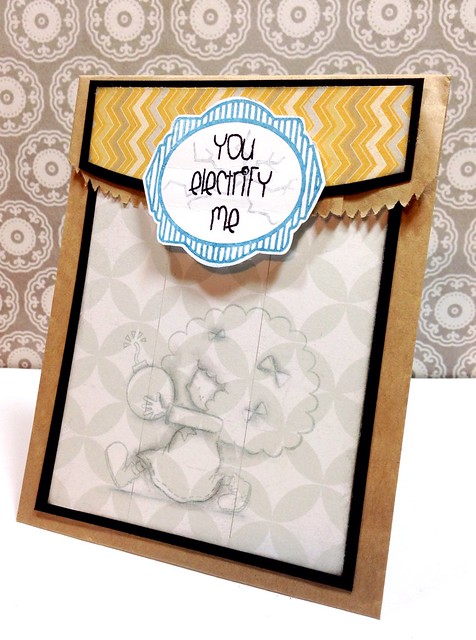
I decorated this fun kraft glassine bag with today's set AND an image from Bombdiggity! I was using my imagination when I paired "electrify" with a bomb, but my hubby liked it so I went with it!! Holding the flap down is a square of sticky-backed velcro so when I fill this bag with treats it stays closed!
Halloween Tags is a 4x8 set that includes a total of 19 stamps and will sell for $18.00.
 Would you like to win the new Halloween Tags stamp set? Here is what you need to do- visit the Trendsetter’s blogs that are participating in each of the blog hop challenges below and comment on their creations as you go. One of the Trendsetter’s blogs (from each hop day) will be randomly chosen as the ‘it’ blog and a winner will be picked using a random number generator from the comments left on that Trendsetter’s Blog Hop Challenge post.
You will not know which blog has been chosen so the more you comment on the better your chances are of winning new stamps! The Blog Hop Challenges will be open until 5 PM Eastern Time Saturday, September 28th with the winner being announced during the release party chat.
Stampendous Maya Road Collaboration
- September 10, 2013
- By Tobi Crawford
- 13 Comments
The Stampendous! design team got to play with some cool Maya Road goodies this week and I got really creative!! The base of my project was a Maya Road Canvas Album. I've never done a canvas album before, but after slapping some gesso on it, how different from my art journal could it be??!!
Step 1:
Mix gesso with ink or ink sprays. (I used Dylusions Sprays)

Step 2:
Paint gesso onto canvas album.

Step 3:
Decorate!!!
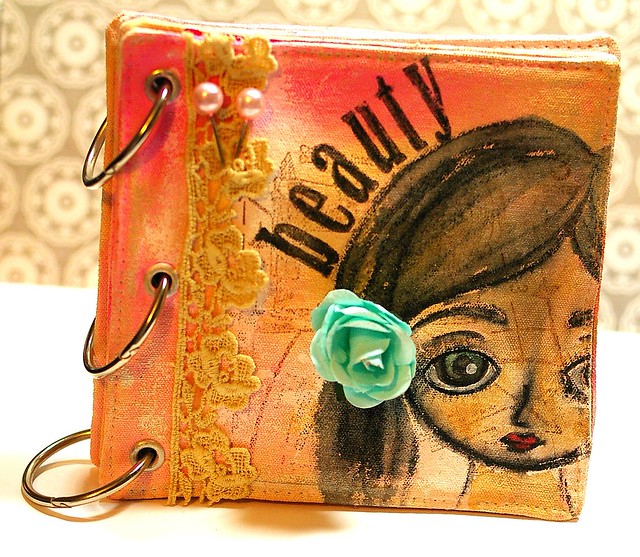
Once the gesso dried I stamped Cling Sewing Elements with brown Archival Ink in the background and drew my girl on top with a Stabilo pencil and Gelatos to add colour.
(The title was stamped with Vintage Lower Case stamps; stick pins by Maya Road; Prima trim and Kaisercraft flower)
Page 2:

This page was a lot of fun with the addition of stencils (Crafters Workshop). Once the stencilling was done I stamped Cling Classifieds in brown Archival ink onto the background. I used some chipboard pieces from Maya Road's Hand and Heart Chipboard set and painted them with silver DecoArt Metallic Lustre. This page was really just me putting a blob of pink in the centre, doodling around it, and sticking the chipboard down. So simple but I love it! lol...
Here's a third page:
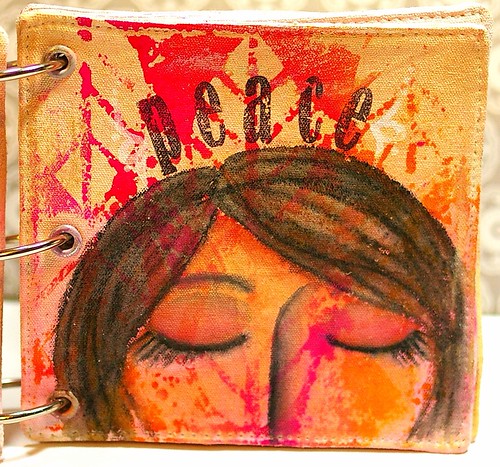
That's all I did for now - but it was a lot of fun and such a cute little album to share with others...
And, of course, there are prizes!! Maya Road will have one grand prize you can win by commenting on their blog, liking them on Facebook, and commenting on their Facebook page. We’ll have three prizes for the week comprised of a Maya Road alterable book (I have two chipboard and one canvas), Some MR chipboard or other embellies, and Stampendous EJK08 White Encrusted Jewel Kit – perfect for covering chipboard with blingy goodness and Stampendous CRW092 Cling Artist Elements and SSC1122 Elegant Borders Perfectly Clear Stamp™ Set. Readers will have until Sunday night September 15th to comment on as many of our team blog posts as they can. Monday we’ll choose three bloggers at random from the week and each blogger will choose one winner from her comments. Winners must have a United States mailing address.
